Process | Umpqua Bank Plaza Conference Center

I have the privilege of working in the field of architecture and photography. As my career in architecture progresses, I’m finding that my photography work is growing along with it. Usually I am photographing architecture or documenting the architectural process. However, every once in a while an opportunity comes along where the photography is used in the architectural design.
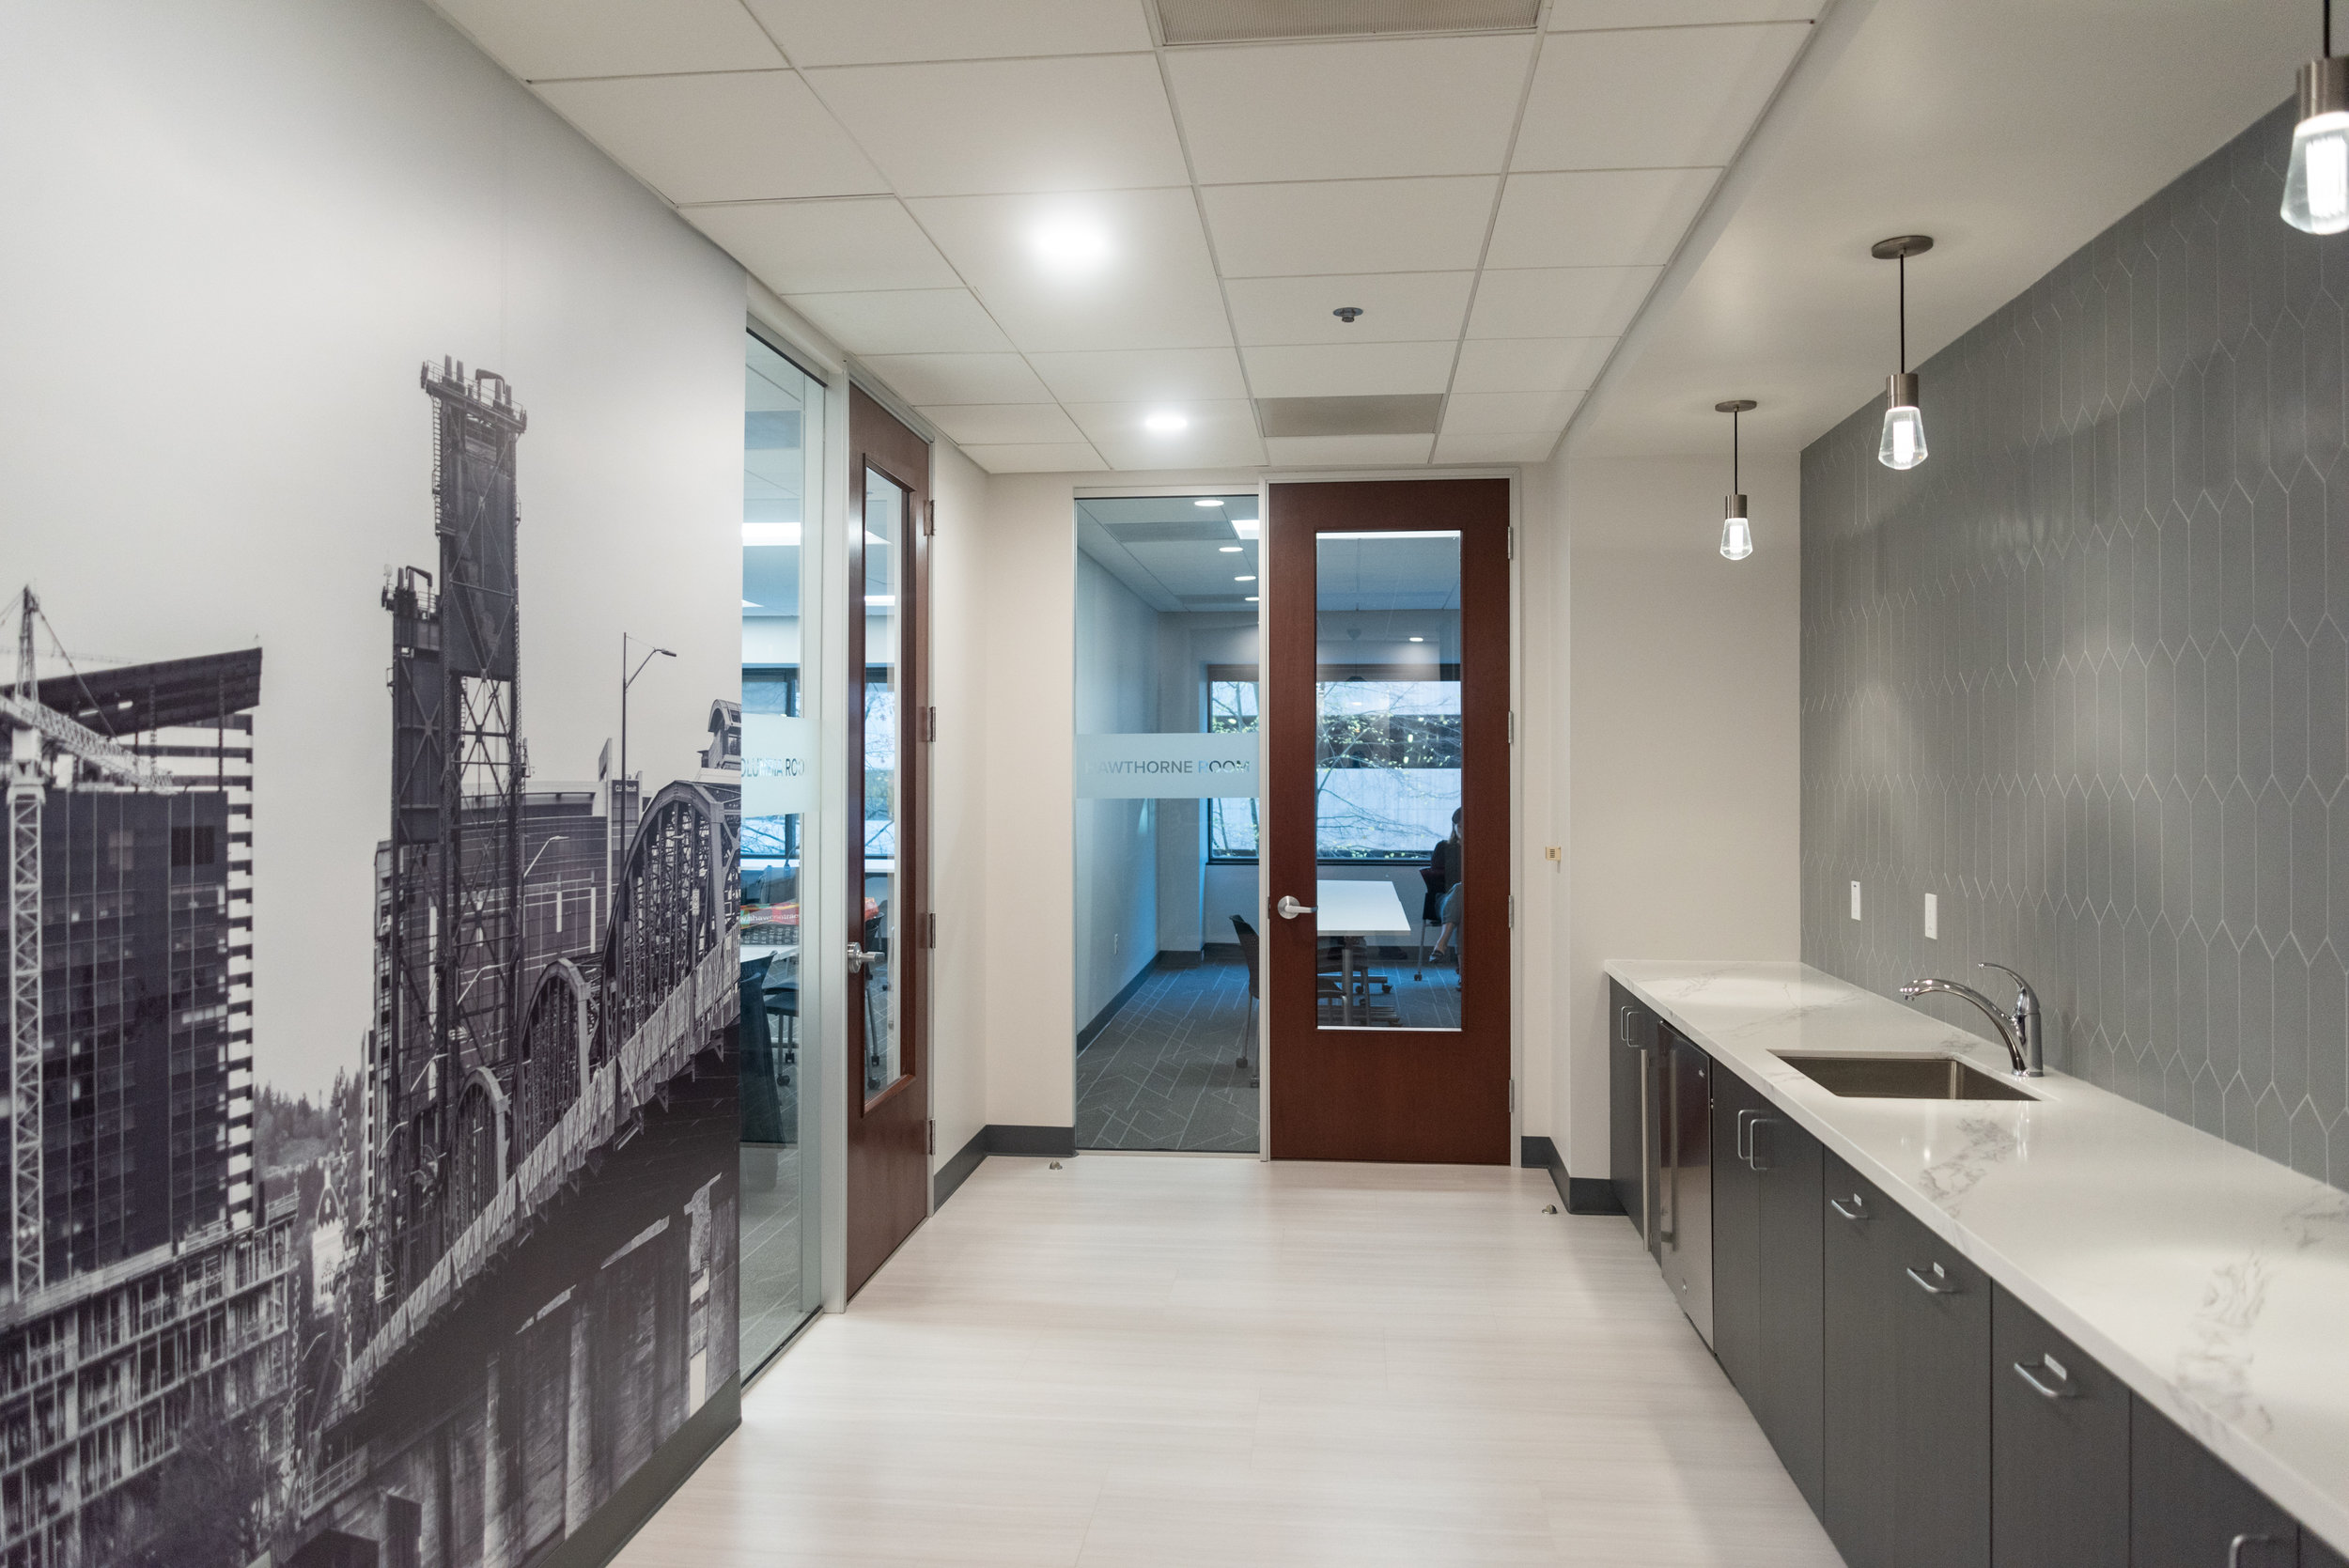
A couple of my coworkers were working on a conference center renovation and the client had a vision of a large graphic wall that depicted their building along the Willamette River Waterfront in Portland. I was asked to help them realize their vision. Their building, the Umpqua Bank Plaza, is in a prominent position to be photographed from the East Bank Esplanade. The client wanted a selective color panoramic photo with their burgundy brick building standing out from the rest of the skyline.
There were a few challenges to this project that I knew I’d have to figure out right away. The room that this photo will be put up in is not a very large room. It was roughly 9’ wide and 42’ long and 9’ tall—a pretty long and narrow room. This means that the normal viewing distance would be very close. I didn’t want the photo to be perceived as too pixelated or blurry from the normal viewing distance. I knew that there was a correlation to the viewing distance and the pixels per inch resolution (ppi) and found a couple of great resolution to viewing distance calculators such as this one.
//WARNING
<MATH>
I entered in the 9’ (108”) x 42’ (504”) image size and the 5’ (60”) viewing distance and it spit out a resolution of 58ppi. This means that my photo needed to be a minimum resolution of 6264 x 29232 pixels. Fortunately, the Nikon D810 has a maximum resolution of 7360 x 4912 pixels per image. This means that if I stitch together a series of portrait mode photos into a panorama, then I should be able to achieve the minimum desired resolution for viewing from 5’ away. 29232 / 4912 = 5.95. If I gave myself zero tolerance, this means that I would need to take a series of 6 photos to cover the resolution needed. However, I like to give myself about a 50% overlap when doing a series of photos for a panorama—resulting in 12 photos needed to cover the resolution. (The end result was a 6495 x 29708 pixel photo after some minor cropping to get the ideal composition).
I knew that the other challenge for this project was that it’s an open space where people can walk right up to the image to view it. Using the same calculator, I typed in a viewing distance of 12” as the worst case scenario of how close someone might get to view the photo and it says 287 ppi (hence the rule of thumb of 300ppi for best quality printing purposes). So I decided to upsample the photo to help smooth out the rough edges when viewing up close. 108” x 504” image at 300ppi would be 32,400 x 151,200 pixels. Now this is where I learned that jpegs have a maximum resolution: 65,535 x 65,535 pixels. Since my long edge is maxed out at 65,535 pixels, dividing that by 504” results in an upscaled image with 130ppi resolution—not that bad.
</MATH>

Now that I know that I can achieve an acceptable quality photo, I set out to take the photo. The local forecast was predicting overcast to partly cloudy skies. I wasn’t too bummed about it and was thinking the photo could actually benefit from the overcast skies as it would help wash out the sky and keep the focus on their building. I found a good spot just south of the Hawthorne Bridge that allowed me to help frame the photo. I took a few series from that spot as well as a few alternate spots. One particular detail that I wanted to make sure I got was the US Flag on top of their building since it was the only one visible from this vantage point. I wanted I good shot of the flag catching the wind a little and waited until I was able to finally get it in a fairly picturesque form. The wind was sporadically blowing here and there, nothing too consistent so it did take a little effort.
After capturing enough photos for a few good panoramas, I began the post processing. After some minor adjustments in Lightroom, I exported out two images, a colored image and a monochrome image. I wanted the red brick to really stand out so I edited the color photo around that and tried to not get distracted by what else was going on in the photo. The monochrome photo I really wanted the details the shine through while maintaining a good contrast between the light and dark tones. A couple of layer masks in Photoshop later and I was able to obtain a satisfactory result. The hardest part of the selective color process was the base of the building where it falls behind the trees in the foreground. The trees were pretty close in color to the building so it was a lot of trial and error as to how best to tackle that area.
From here, it was a matter of coordinating with the printer about where and how to install the image—particularly around the corner. A few months later, the construction of their newly renovated conference center was back open. A few weeks ago I finally got a chance to head over there to check out the space and see how the massive photo wall turned out. I was pleasantly surprised at how clear the photo was from just a couple feet away. I also did take a minute to soak in the meta moment of taking photos of an architectural space that features a photo that I took for that space that features the building that the space is in.